
I have been reading about board and batten, and pinning all the great DIY tutorials for awhile now. My extra bedroom, which at the moment houses the ironing board and paper shredder (well there are actually two paper shredders, I keep breaking them by shredding too many piece of paper at once :)), needed some architectural detail. It is a very boxy room, with one small window. At some point, this room will probably be an additional guest room. It seems that many of our guests are used to sleeping in a larger bed than the double bed that is in the current guest room. So having an extra sleeping space, even if it is an upgraded air mattress would be ideal. But back to the board and batten...the room needed some interest, and a focal point. Board and batten was the perfect touch, on trend but still a classic wall treatment. And my father-in-law, who is very handy, was in town visiting. Sounds like the perfect time for a house project!

The room before...note the paper shredders.
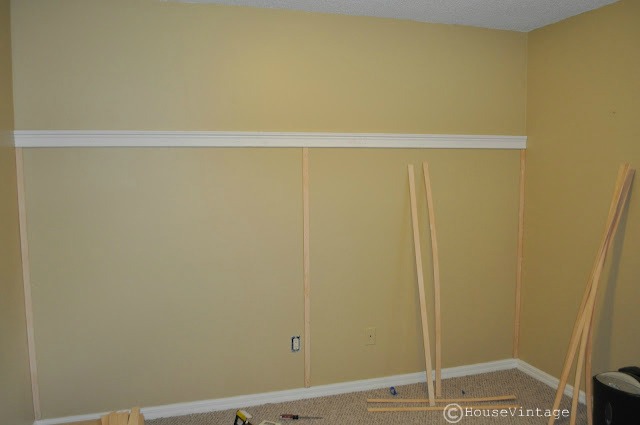
Door casing was used as the top horizontal piece at the suggestion of many of the DIY tutorials. It has a little bit of a ledge, that it perfect for photos or artwork.

For the batten pieces, we used lattice strips. It is thin, easy to cut with a hand saw, and paintable. We set the lattice pieces every 16 inches to line up with the studs. My father-in-law cut an extra piece of lattice into a spacer so once the first piece was plum, the rest of the battens went up quickly. I actually used finish nails instead of glue. I opted not to use glue to make the board and batten easier to remove in the future, if needed.

Next, I filled the nail holes and started with the first coat of paint. I actually used up some leftover semi-gloss plaint. I opted not to caulk the seams before painting, for the same reason I didn't use glue.

It took about 3 coats of paint, and then a little touching up. But I am really excited about the results.


The afters! It certainly makes this wall a focus, and I think it will make a cute headboard for the bed/ air mattress that we plan to purchase. A special thank you to my father-in-law (who is an avid reader of my blog :)) for helping me with this project. It was fun to work together and I love the results! This is a great DIY project, as it was completed for less than $100, and didn't require any expensive material or special tools.
Project Budget Breakdown:
Door casing- $31.63
Lattice- $32.31
Nails- $3.47
Putty- $5.48
Painting supplies- $8.89
Total: $81.79
Painting supplies- $8.89
Total: $81.79

No comments:
Post a Comment