Monday, October 7, 2013

Painting Furniture Lessons

Today, I am sharing some lessons I have learned about painting furniture.  I have divided these simple tips based on your ability, so even if this is the first piece of furniture you have ever painted, it will turn out great.

Beginner
  • A great finished product, starts with proper preparation.  Sandpaper and a good primer are your best friends.
  • Practice makes perfect.  Buy second hand furniture at garage and estate sales to refine your technique.
  • Estate sale globe painted with spray paint.
  • Pick the right paint.  Spray paint works well for smaller pieces with lots of nooks and crannies. Latex paint is fine for larger pieces.
Intermediate
Once you have honed your skills, try some of these tips to up the ante.
  • Mix your own paint colors.  I like to use leftover latex wall paint to make custom colors for furniture.
  • Try different painting techniques like distressing.  Paint a base color, then a contrasting top coat.  Use sand paper to remove the top color in areas that would typically show wear like corners.
  • Change up the paint finish you are using.  High gloss gives a modern look, whereas a flat finish will look primitive.

Advanced
Now you're an expert...have some fun.
  • Mix your mediums.  Paint and stain are a great combination, or mix your paint colors for a contrasting look.
  • Decorate with paint.  Try polka dots for a child's room, or stripes in the entry way.  If you don't have a steady hand, use painters tape or stencils (buy or DIY).  
  • Try different types of paint like chalk or milk paint.

Sunday, July 28, 2013

Clipboard Message Center

This message center has a chalkboard and a cork board, and is so quick and cute.  It is something you will want to try this weekend!

Start with a clipboard.  I'm using a vintage clipboard that I purchased from a flea market a few years ago.  This clipboard is a little longer than the standard size, but any clipboard will work.  I often see them at garage sales for less than a quarter.  Your clipboard doesn't need to be in perfect condition, this is a great project for recycling.


Next, tape off a section of the board, so you can apply chalkboard paint.  Any shape or size will do, just think about how much writing space you will need.


Allow the paint to dry and cure.  Before you remove the tape, use a piece of chalk to season the board so your writing will be erasable.


For the cork board section of the message center, I used a cork trivet.  These can be purchased at any craft store or dollar store.  You can leave the cork trivet a la natural, or cover it.  I searched my scrap pile for a fun fabric to use.  Simply trace the trivet onto the fabric.


Cut out the fabric and glue it onto the cork.  I used hot glue.  Then secure the fabric-covered cork circle to the clipboard.


Now you can keep your family informed and organized with this clipboard message center!


Tuesday, July 9, 2013

Contributor Post

I'm over at A Little Tipsy today sharing a fun memo board.  Check it out!

Wednesday, June 5, 2013

The Best of May

I know I sound like a broken record, but the months are just flying by.  May was no exception...


Catch up on the happenings of JanuaryFebruary, March, and April.

Wednesday, May 29, 2013

Salvaged Coat Hanger

I have my second contributor post to share with you today.  This project only takes a few hours and shouldn't cost much money.  By utilizing salvaged materials, you can make a Coat Hanger.


The supplies you will need are:


Water spigot knobs are easy to find at flea markets and usually cost a few dollars.  They can also be found on Etsy.  My pile has been collected over time, as I would find them out thrifting.  The wood board was a leftover scrap.  If you don't have any scrap wood around, you can buy this already precut at the hardware store.  They come in a variety of lengths.  Pick the right size for your space.


Rusty knobs were painted with several thin coats of spray paint.  I also added some stain to enhance the tone of the wooden board. Remember to always paint and stain in a well ventilated area.


Decide how many knobs you would like your coat hanger to have.  Four worked well on my board.  I used a yard stick to make sure they were evenly spaced.   The knobs are then screwed into the board, from the front.  The thickness of the board and the knob will determine the size of screw to use.  I also added a plastic spacer and/or washer to allow for space behind the knob where items can hang.  Each of my knobs had a different depth, so you may have to use a different configutaion on each.  I also didn't pre-drill my holes, but if you are using a wood that splits easily, you may opt to do that.


Find a place that could use some extra organization or storage, and hang it up.  Your salvaged coat hanger is done!


Wednesday, May 22, 2013

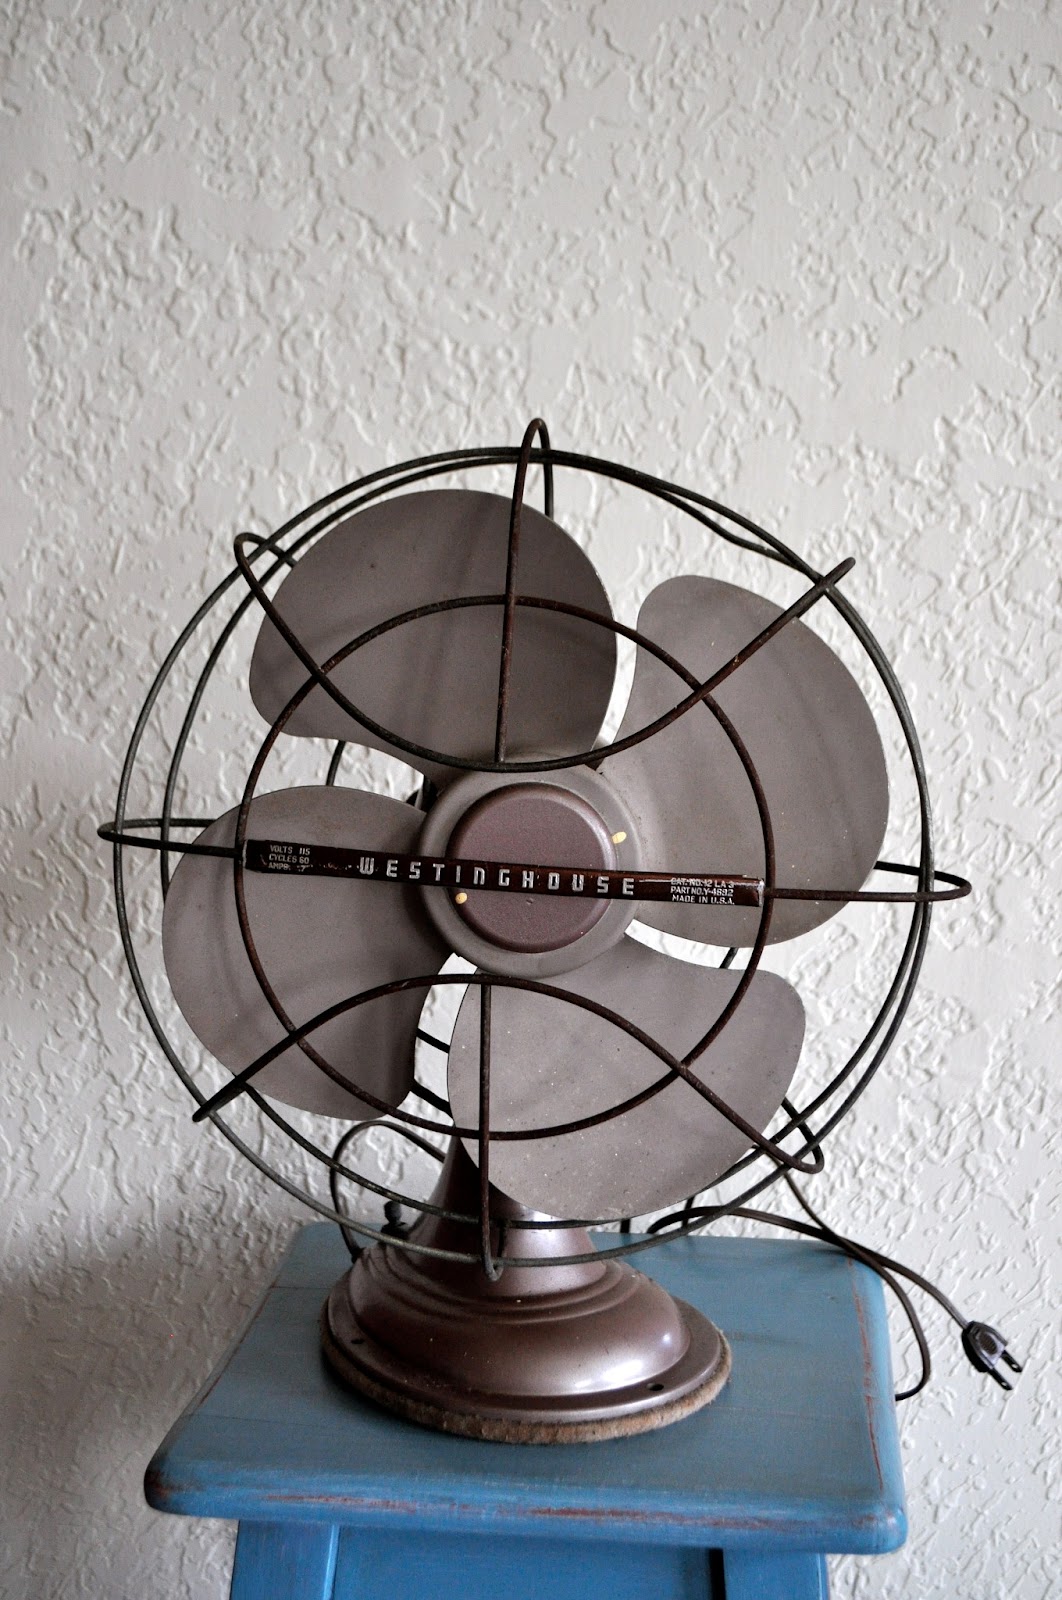
Vintage Fan Color Palette


Tuesday, May 21, 2013

Second Contributor Post

My second contributor post is up over on A Little Tipsy...check it out.

Tuesday, May 14, 2013

Enamelware Love

A lovely blogger bought this enamelware plate from me and shared how she used it on her blog chocolat-et-marrons-grilles.  Isn't it styled beautifully? 
chocolat-et-marrons-grilles
Her photo really made me appreciate enamelware (even more)!  I have a roundup of sweet enamelware photos to share with you today.


|1|   |2|   |3|   |4|

Monday, May 6, 2013

Organization Idea: Pegboard

A multi-function space requires excellent organization.  Since my craft room also doubles as my guest room, I must ensure that there is adequate storage for all my supplies, and adequate space for guests. Always on the lookout for simple yet smart storage solutions, when I saw a white pegboard for $1, I knew it would be perfect in my craft/ guest room.  Pegboards are great because they provide storage and organization, without taking up square footage.


 This wall as you enter the room didn't serve much purpose, so I decided to put the pegboard here.  However, I needed to remember that this was going to be the first thing people saw as they entered the room.  Because this is where my guests stay, I wanted it to still be inviting.


I picked out some of the crafty supplies that I use frequently.  But also considered materials that were colorful and pretty to look at.


Next, I laid everything out to ensure a nice symmetry and that it would all fit.  Because a pegboard is so flexible, there wasn't a lot of pressure to get everything perfect.  It can always be changed as needed.


Anyone else rockin' a new pegboard?

Wednesday, May 1, 2013

The Best of April

I certainly have had my fill of April showers, and am hoping that as promised May will deliver some flowers. Despite the April rain, we did accomplish a great deal during the month.


Catch up on the happenings of JanuaryFebruary, and March.

Monday, April 29, 2013

Estate Sale Finds- Randomness

Warmer weather means more opportunities to snag some thrifty treasures.  Today's collection of finds is quite a random mix of things, acquired over the last few months.  If you are a long-time reader, you might think I have a thing for deer.  It is true that I have featured a few deer on the blog.  But I bought this piece because it is cute (of course) but also because it is mint in the package.  These cardboard wall hangings are from the 1950-60s, and this one is in great condition.  Would be pretty cute in a nursery.


Another piece from the past....a vintage radio.  This radio has nice color and texture. And it looks like the Mercedes logo is on the front.  I wonder if there is any connection...I might have to research this.


These old fans are so neat, and I always wanted to own one myself.  This one came from an estate sale.    It is inoperable.  The cage is bent, so the fan blades don't turn.  But I like it for display.


What have you found lately...do share! 

See more thrifty treasures hereherehere, and here.

Thursday, April 25, 2013

Master Bedroom- Refresh

I don't know about you, but there are some rooms in my house that seem to come together rather quickly.  And then there are other rooms, that take months  years to get right.  The master bedroom is one of those rooms for me.  It started out with hacking these Ikea chests into bedside tables.  


Monday, April 22, 2013

Vintage Puzzle Chalkboard- DIY

In honor of Earth Day, I am sharing a great reuse project.  Vintage wooden puzzles are always something I come across at estate and garage sales.  Sadly, over the years of children playing with them, they often end up missing pieces and incomplete.  Such was the case for this USA map puzzle.


Thursday, April 18, 2013

Going Once, Going Twice...Sold: 5 Tips for Attending your First Auction


One dollar bid, now two, now two, will ya' give me two? Two dollar bid, now three, now three, will ya' give me three?  

Oh yes my friends...that is the sound of the auction, beckoning you to come in and buy some stuff!  Until very recently, I had never been to an auction.  I suppose that is not entirely accurate, as I do vaguely recall attending a doll auction with my mom when I was little.  But I really was unclear about what was going on, and I remember sitting very still, afraid that even the slightest movement would be mistaken for a bid!

But let me tell you, I have been missing out.  Auctions are fun!  I was a little nervous going to my first "real" auction, so I want to share a few tips with you.  So if you decide to go, you will feel like an expert.

Tip 1:  Do Your Research
Most auction houses advertise their upcoming sales online with pictures or with a paper catalog of the items to be sold.  Spend some time viewing the online photos to decide if the auction is a good fit for you.  Some auctions are very specific, selling only one kind of item (cars, coins, etc.), while others will have a variety.

Tip 2:  Arrive Early
Typically the auction house will be open a few hours/ days before the start of the sale for you to preview the items.  At an auction items are sold "as is, where is" meaning the buyer is responsible for inspecting the condition before the sale.

Tip 3:  Get a Number
See the clerk of the auction to register and get a number for bidding.  They will need your name, address, and driver's license in order to issue you a number.  Get a number even if you don't think you will buy anything...you just never know!

Tip 4: Beware the Fees
Most auctions charge a buyer's premium, which is an additional fee tacked on to purchased items.  Sometimes the fee is a percentage of the price, sometimes it is a flat fee.  Make sure you know the terms of sale, so you can factor this fee into the overall purchase price.

Tip 5: Just Ask
There may be other items in the auction house that you are interested in, that are earmarked for a future sale.  Ask the auctioneer to sell that item while you are there.  Most of the time, they are happy to accommodate you.

I hope you will attend an auction in your area soon!  It really is a fun time!

Tuesday, April 16, 2013

Elephant Love

What is yellow, and cute, and useful too?  Why my sweet little elephant planter that's who!  I found this yellow ceramic planter in the shape of an elephant at a flea market. The color was bright and cheery, and I had a succulent already waiting at home to plant.


Thursday, April 11, 2013

Industrial Style Light Tutorial

 Industrial chic is everywhere right now, and I must admit I have a little design crush on this look.  It is such a perfect mix of new and old, rustic and modern.  Today I am turning a salvaged metal cage into an industrial style pendant light.  Let me show you how.


This project began when I found an old and very dirty metal cage at a flea market.  I brought it home for $1 and knew it was the perfect starting point for a new light, after some cleaning of course! Also necessary to this project is a light cord (I usually buy mine from IKEA) and a vintage style light bulb.  The bulb was the most expensive supply. You can typically find them at any hardware store for around $10.


This particular cage opened to accommodate changing the light bulb, but I did need to find a way to keep it closed the rest of the time.  I used a simple fine gauge wire and threaded it through the two openings.  You will want to use a wire that is easy to bend.


Next, screw the light bulb into the cord, and insert the light cord and light bulb into the cage.  Use the wire to tighten the cage around the threaded end of the cord.  Once it is secure, cut off the excess wire.  Be sure to turn the pointy end of the wire under, so there are no sharp edges exposed.


And there you have it....a great vintage looking industrial pendant light.


The only thing left to do, is to find the perfect spot to hang it in your home.  I think I could cuddle up with a good book right here!


Monday, April 8, 2013

Changing Out a Light: Tips


 Updating a light fixture is a home improvement project that you can easily do yourself.  In less than an hour, you can replace an old, boring light with something great.  There are many tutorials and videos out there to tell you step by step how to change out a light.  In fact, the instructions that came with my new fixture were excellent.  I just wanted to share a few tips, I have learned along the way.

Tuesday, April 2, 2013

Contributor Post- A Little Tipsy

I'm sharing a great industrial tutorial over on A Little Tipsy today.  I'm a regular contributor there so go check it out!

Monday, April 1, 2013

The Best of March

I feel like I was just looking back on all that was accomplished for February.  And here we are again! In March we...


Catch up with all the fun in January and February.

Wednesday, March 27, 2013

Estate Sale Finds- Dollar Edition

It's that time again...where I share the stuff I found while thrifting. Today's items come from both estate sales and flea markets, but no item cost more that $1.  Let's take a look shall we...


First up is a little birdie salt/pepper shaker that is made to rest on the lip of a bowl. I guess there are occasions when you need easy access to your seasonings.  This little cutie only cost $1 from the flea market.

I purchased this puppy s&p shaker from the same dealer as the birdie. They were next to each other on  the table and seemed like friends, so I bought them both.  He was $1 too.


 I found these vintage mid-century table legs at an estate sale in the garage.  They are a little worn, but could be refinished with paint or stain. I always buy vintage hardware or table legs when I find them, because they are such versatile pieces.  Another buck...are you sensing a theme?


Finally this jadeite bowl.  At least I think it is jadeite.  It isn't marked, so it might not be authentic.  However the estate sale that I purchased it from also had other pieces of vintage glassware, so it is a possibility.  I only spent a quarter for it, so if it isn't the real thing I am ok with it. The color is fabulous.

What thrifty finds have you seen lately?  Any items for only a dollar?

See more thrifty treasures herehere, here, and here.